21 April 2021

Game controller project


For my controller I wanted to go for something simple yet effective. And I also chose a game with a simple yet fun controller scheme. I decided to use the game VVVVVV to showcase my game controller since the game only has 3 inputs. Simplicity was the key here and I wanted the game to fit the controller in a way. The game is simple in controls and graphics and my controller is just that, It labels the inputs you can preform at the zenith of the box, and when you tilt in one of the three directions, the tilt controls will activate, allowing you to game, just by tilting the box!

What should I add to make my box more fun to use?


CODE:

#include <Adafruit_CircuitPlayground.h>

#include <Adafruit_Circuit_Playground.h>

#include <math.h>

#include <Keyboard.h>

//Made By Niles Garcia


//Variables

int lrGate = 5;

int fbGate = -5;

float lrTilt = 0;

float backTilt = 0;


void setup() {

    //Put your setup code here

    Serial.begin(9600);

    delay(9600);

    CircuitPlayground.begin();

    Keyboard.begin();

}

void loop() {


  //Motion Sensors

  lrTilt = CircuitPlayground.motionX();

  backTilt = CircuitPlayground.motionY();


  //Jump if tilting controller forward

   if(lrTilt > fbGate){

    Keyboard.press(' ');

  }

  else

    Keyboard.release(' ');  

  //If leaning right with controller, the character will move right

  if(lrTilt > lrGate){

    Keyboard.press('d');

    Serial.println("right");

  }

  else

    Keyboard.release('d');


  //If leaning left with controller, the character will move left

  if(lrTilt < -(lrGate)){

    Keyboard.press('a');

    Serial.println("left");

  }

  else

    Keyboard.release('a');

}

18 April 2021

Pepsi Controller: The (not) official drink/controller of Pepsiman!

 The idea behind this controller is to take a Pepsi can and make it work for the game Pepsiman to really bring the soda theme full circle. How it works is that the CPE, which is inside the can, is basically being used for Gyro controls, recognizing where the can is being tilted and moving either left or right accordingly as well as jumping if flicked up or sliding if pulled back. The controls are intuitive I think, as if you were to go in without any idea of the controls, you'd naturally just start moving it left and right and realize how it works. As the game is fast paced and requires the player to make inputs quickly, the feedback is quick and snappy as they're constantly moving around. I think the controller mostly holds up to this, although a flaw might be where the person playing doesn't reset the controller back to a neutral position, which leads to the game not getting some inputs as you drift farther away from where the controller would register certain positions. There is also the use of the sound sensors as you can see in the code, which would have been used to activate the boost in the game Sodaman, requiring the player to scream at it. However, the game stopped working due to an update, which required me to use a different pepsi based runner game to demonstrate instead. Pepsiman doesn’t have a boost function however, so the feature isn’t shown despite it being supported. In all honesty that might be for the best, as it wasn’t a particularly intuitive design and might have led to people activating it accidentally at times that would make them lose a life.


#include <Adafruit_CircuitPlayground.h>
#include <Adafruit_Circuit_Playground.h>
#include <math.h>
#include <Wire.h>
#include <SPI.h>
#include <Keyboard.h>


//Code by Christopher Flango for the Pepsi Controller!

#define SAMPLE   10  // Sample window for average level

const int debounce = 100;
const int threshold = 500;

float mapf(float x, float in_min, float in_max, float out_min, float out_max);

void setup() {
 // put your setup code here, to run once:
 

  Serial.begin(9600);
  //while(!Serial);
  CircuitPlayground.begin();
}

void loop() {                                                                                                                                                                                                                                                                                                                                                                                                                                                                                                                                                                                                                                                                                                                                                                                   
  // put your main code here, to run repeatedly:

  //read accelerometer x and y
  float y = CircuitPlayground.motionX();
  float x = CircuitPlayground.motionY();
  float rad = atan2(y,x);

  float m = 0; //peak level

  //read microphone and get loadest level over sample window
  m = CircuitPlayground.mic.soundPressureLevel(SAMPLE);

  //Serial.print("\t S value: ");
 // Serial.print(m);
  //Serial.print("\t X value: ");
  //Serial.print(x);
  //Serial.print("\t Y value: ");
  //Serial.println(y);

  //controls for boost
  if(m > 90)
  {
  Keyboard.write(129);     
  delay(debounce);
  }

  //controls for gyro
  if(x >= 4 && y <= 5)
  {
  Keyboard.press(216);
  delay(debounce);
  }
  else
  {
    Keyboard.release(216);
  }

  if(x <= -4 && y <= 5)
  {
  Keyboard.press(215);
  delay(debounce);
  }
  else
  {
    Keyboard.release(215);
  }

  if(y >= 5 && x <= 4)
  {
  Keyboard.press('Z');
  delay(debounce);
  }
  else
  {
    Keyboard.release('Z');
  }

  if(y < -5 && x < 2)
  {
  Keyboard.press('S');
  delay(debounce);
  }
  else
  {
    Keyboard.release('S');
  }
 
  delay(20);
}


Question: Do you think that the scream feature should have been included in the first place, or was there a better way to go about implementing it?


Tetris Game Controller


Originally I had intended to create a controller for HellTaker, but reconsidered it after feedback from the progress review. I instead decided to go with Tetris, which is a much more tame and family friendly game than HellTaker, which is about acquiring a harem of demons. I took my concepts from the first assignment in this project and applied it to Tetris, controlling the game through motion controls. I was then able to have fun with designing the new controller which I thought a Tetris block suited it best. Essentially the CPE within the Tetris block responds to the directions it is tilted in as well as light exposed to it. Tilting the block left or right would result in the on-screen block being moved accordingly. Tilting the controller towards me would rotate the on-screen block, and tilting it away from me would instantly drop the block down. I made a hole in the top of the controller that would allow light to spill in, setting off the CPE's light reading functionality. This would activate the "hold" function in Tetris and hold whatever block was on-screen for later. It can be swapped out for another block via the same function in game.

Was there any visual feedback you think I could have given the player from the CPE itself or was the feedback on the screen enough?


#include <Adafruit_CircuitPlayground.h>

#include <Adafruit_Circuit_Playground.h>

#include <math.h>

#include <Keyboard.h>


/*

Code by Nicholas Suarez

Controller for Tetris

*/


//init variables 

bool xDown;

bool yDown;

int xMove;

int yMove;


void setup() {


  Serial.begin(9600);

  Keyboard.begin(); 

  CircuitPlayground.begin();

}


void loop() {


  float x = CircuitPlayground.motionX(); //Gets motion in X direction

  float y = CircuitPlayground.motionY(); //Gets motion in Y direction (technically Z)


//motion outputs thresholds to integers

  xMove = map(x, -10, 10, -10, 10);

  yMove = map(y, -10, 10, -10, 10);


  Serial.print(x);

  Serial.println(y);


//Tilting the CPE past the number would fire the function

    switch(xMove) {

      case -9 :

        if(!xDown) { 

          Keyboard.write('A');

          xDown = true;

        }

        break;

      case 9 :

        if(!xDown) {

          Keyboard.write('D');

          xDown = true;

        }

        break;

      case 0 : xDown = false; 

        break;

    }


    switch(yMove) {

      case -9 :

        if(!yDown) {

          Keyboard.write('S');

          yDown = true;

        }

        break;

      case 9 :

        if(!yDown) {

          Keyboard.write('W');

          yDown = true;

        }

        break;

      case 0 : yDown = false;

        break;

    }


     int light = analogRead(A8); //Reads the light sensor to press Space. Activates Hold function.

  if(light > 30) {

    Keyboard.press(' '); 

                 }

  else if(light <30) {

    Keyboard.release(' ');

                 }

}


Project - Game Controller

 Game: Root Beer Tapper

https://archive.org/details/arcade_rbtapper 


Arcade games were simple, but a highly enjoyable form of entertainment for their time. Controls were the bare minimum, usually featuring around three inputs. Some machines were more unique and had thematic controls. “Root Beer Tapper,” or “Tapper,” had a physical tap or lever players had to use to fill the in-game mugs. For my controller, I sought to recreate this concept utilizing the class materials. 

The controls consist of two potentiometers and a lever. The lever is used for filling the mugs while the potentiometers control the character’s movement. Much like an arcade cabinet, the inputs are laid out side by side, primarily due to the limitations of how far the wires inside would reach. The lever was a much more complicated control. I initially wanted to use a plastic water tap, but I realized it would be much too small and not work how I wanted. I decided to build my own tap out of soap boxes. The CPE is mounted to a piece of cardboard that is suspended by a thread. The thread is also attached to the upper portion of the lever, so that when the player lowers it, the CPE is tilted to the right. All materials are recycled, utilizing objects I had around the house to save on costs and reduce waste. 

Neat and clear mapping allows my inputs to easily signify they are meant for the player to interact with. The lever has a visible joint, which acts as a major signifier that it is meant to be bent in that direction. Additionally, the potentiometers resemble screws, both of which twist. Feedback is present through immediate visual changes and sound effects from the game. It would have been possible to use LEDs or a tone from the CPE to enhance user experience. My controller was meant to pay homage to older games and to try and recreate a gimmick input. It was challenging, since I do not have much experience in terms of “engineering” a product, but I believe my custom lever allowed me to step out of my comfort zone and to create a highly unique controller that is more than just converting inputs to different types of inputs. 


For my peers: What could I have possibly used to create a better tap/lever input? Should I have used a different input instead?


//Libraries

#include <Adafruit_CircuitPlayground.h>

#include <Adafruit_Circuit_Playground.h>

#include <Keyboard.h>


//Code by Paulina Weintraub 2021


//Variables

int moveVert = 0;

int moveHor = 0;


int moveHorizontal = 0;

int moveVertical = 0;


boolean pressed = false;

boolean mug = false;


void setup() {

  // put your setup code here, to run once:


  Serial.begin(9600);

  delay(1000);

  CircuitPlayground.begin();

}


void loop() {

  // put your main code here, to run repeatedly:


  //Receive analog values from the accelerometer

  float x = CircuitPlayground.motionX();


  //The value r which is from 0 to 255, mapped to the value x, which is from -10 to 10

  int r = map(x, -10, 10, 0, 255);


  //Potentiometer input

  moveVert = analogRead(A2);

  moveHor = analogRead(A3);


  //Potentiometer mapping

  moveVertical = map(moveVert, 0, 1023, 0, 10);

  moveHorizontal = map(moveHor, 0, 1023, 0, 10);


  //Potentiometer 1

  //If turned to the left, move tapper left (hold left arrow key)

  //If turned to the right, move tapper right (hold right arrow key

  //There is a "middle" zone where the player can turn the potentiometer back to "release" the key


  if(moveHorizontal == 10){

    Keyboard.press(216);

    delay(500);

  }


  if(moveHorizontal != 0 && moveHorizontal != 10){

    Keyboard.releaseAll();

  }


  if(moveHorizontal == 0){

    Keyboard.press(215);

    delay(500);

  }


  //Potentiometer 2

  //If turned to the right (clockwise), move tapper down one space (tap down arrow key)

  //If turned to the left (counterclockwise), move tapper up one space (tap up arrow key)

  //There is a "middle" zone where the player can turn the potentiometer back to "release" the key

  //Used a "pressed" boolean to ensure the key is pressed only once, but I kept the release as a precaution


  if(!pressed && moveVertical == 10){

    pressed = true;

    Keyboard.press(217);

    delay(500);

  }


  if(moveVertical != 0 && moveVertical != 10 && pressed == true){

    pressed = false;

    Keyboard.releaseAll();

  }


  if(!pressed && moveVertical == 0){

    pressed = true;

    Keyboard.press(218);

    delay(500);

  }


  //Tilting on the x-axis

  //Tapper must be standing against the tap 

  //While the CPE is tiled to the right, begin filling a mug (hold left ctrl)

  //Release to send mug to customer (release left ctrl)

  //If released too early, mug won't be full

  //Used a "mug" boolean to ensure the key is pressed only once


  if(!mug && r >= 180){

    mug = true;

    Keyboard.press(128);

    delay(500);

  }


  if(r <= 180 && mug == true){

    mug = false;

    Keyboard.release(128);

    delay(500);

  } 


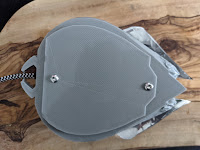
Thumper: Space Beetle


The space beetle controller is designed after its namesake; made to resemble the player’s character in Thumper, it aims to mirror the physicality of the game. 3D modeled and printed in the game avatar’s image; a distinct design effectively conveys a connection to its specialized purpose. Its controls are mapped with this in mind; squeezing both wings presses space and allows the player to speed up or jump when appropriate. This is handled by force-sensitive resistors held between the wing flaps. Turning the beetle left or right while the wings are down lets them slide in the corresponding direction while tilting the controller upwards opens the wings or allows the player to fly. All of these are inputs from the accelerometer mapped to a range that lets the CPE determine which direction the player intends to go. The signifiers rely on the player taking cues from their character, though given the expertise I would have liked to add lights in the eyes that denote which direction is currently being registered by the accelerometer. The feedback is a one-to-one response to their inputs; closing the wings causes the character to do the same, as with turning and flying. Its lack of external or visible buttons with a focus on the metallic wings tells the user that they need to interact with it in a more creative way than a traditional device. Allowing the player to consider their movements in a 3D space and experience the visceral rhythm of Thumper in a different light. 

Besides the LED idea, what other signifiers would compliment this design? I feel like physical feedback like a physical rumble and a buzzing sound for different movements would have contributed a lot to the legibility of the control scheme, but I also wonder if there was a method to incorporate printed instructions that wouldn’t have looked out of place.  

/////////////////////////////////
//  Space Beetle    //
//  By Julia Houha  //
////////////////////////////////

///////////////////////////////////////////////////////////////////
//          Instructions:                   //
// Jump: Space / Both Wings                 //
// Speed: W / Tilt Up                        //
// Left Slide: A / Tilt Left + Left Wing    //
// Right Slide: D / Tilt Right + Right Wing //
///////////////////////////////////////////////////////////////////

///////////////////////
//  Libraries  //
//////////////////////

#include <Keyboard.h>
#include <Adafruit_CircuitPlayground.h>
#include <Adafruit_Circuit_Playground.h>

///////////////////////
//  Variables  //
///////////////////////
// Create turn int
const int debounce = 100;
const int threshold = 500;

bool jumping = false;
bool sliding = false;
bool zooming = false;

float Lforce = 0.0;
float Rforce = 0.0;
bool leanL = false;
bool leanR = false;

const int lFSR_PIN = A2; // left FSR pin
const int rFSR_PIN = A3; // right FSR pin
const float VCC = 3.27;  // input voltage
const float R_DIV = 9930.0;  // resistor

////////////////////////////////
//  Keyboard Map  //
///////////////////////////////

void setup() {
  Serial.begin(9600);
  CircuitPlayground.begin();
  //Keyboard Inputs
  pinMode(CPLAY_SLIDESWITCHPIN, INPUT_PULLUP);  // failsafe for infinite loop
  pinMode(CPLAY_LEFTBUTTON, INPUT_PULLDOWN);    // placeholder left force sensor
  pinMode(CPLAY_RIGHTBUTTON, INPUT_PULLDOWN);   // placeholder right force sensor
  pinMode(lFSR_PIN, INPUT);                     // left FSR
  pinMode(rFSR_PIN, INPUT);                     // right FSR
  Keyboard.begin();
}

// Loop
void loop() {
  // Failsafe Switch
  if (!digitalRead(CPLAY_SLIDESWITCHPIN)) {
    Keyboard.releaseAll();
    //Serial.println("released all keys");
  }
  if (sliding == false) {
    Keyboard.release('A');
    Keyboard.release('D');
  }

  // Space Inputs
  if (jumping == false && leanL == true && leanR == true) {
    Keyboard.press(' ');
    jumping = true;
  }
  if (jumping == true && leanL == false || leanR == false) {
    Keyboard.release(' ');
    jumping = false;
  }
  slideX();
  zoomY();

  // LEFT FSR reading
  int LfsrADC = analogRead(lFSR_PIN);

  if (LfsrADC != 0) {
    float LfsrV = LfsrADC * VCC / 1023.0;
    float LfsrR = R_DIV * (VCC / LfsrV - 1.0);
    //Serial.println("Left Resistance: " + String(LfsrR) + "ohms");
    Lforce;
    float LfsrG = 1.0 / LfsrR;
    if (LfsrR <= 600)
      Lforce = (LfsrG - 0.00075) / 0.00000032639;
    else
      Lforce = LfsrG / 0.000000642857;
    Serial.println("Left Force: " + String(Lforce) + " g");
    Serial.println();

    //delay(500);
  }

  // RIGHT FSR reading
  int RfsrADC = analogRead(rFSR_PIN);

  if (RfsrADC != 0) {
    float RfsrV = RfsrADC * VCC / 1023.0;
    float RfsrR = R_DIV * (VCC / RfsrV - 1.0);
    //Serial.println("Right Resistance: " + String(RfsrR) + "ohms");
    Rforce;
    float RfsrG = 1.0 / RfsrR;
    if (RfsrR <= 600)
      Rforce = (RfsrG - 0.00075) / 0.00000032639;
    else
      Rforce = RfsrG / 0.000000642857;
    Serial.println("Right Force: " + String(Rforce) + " g");
    Serial.println();

    //delay(500);
  }

  // Setting left and right leans
  if (Lforce > 300) {
    leanL = true;
  } else
    leanL = false;

  if (Rforce > 300) {
    leanR = true;
  } else
    leanR = false;
}

// Slide
void slideX() {
  float x = CircuitPlayground.motionX();

  // map to accelerometer for left or right slide
  int slide = map(x, -10, 10, -3, 3);

  // left slide when rotated left with left button pressed
  if (sliding == false && slide == 2 && leanL == true) {
    Keyboard.press(' ');
    Keyboard.press('A');
    //delay(debounce);
    Serial.println("sliding left");
    //Serial.println(slide);
    sliding = true;
  }
  if (sliding == true && leanL == false) {
    Keyboard.release(' ');
    Keyboard.release('A');
    //delay(debounce);
    //Serial.println("stopped sliding");
    //Serial.println(slide);
    sliding = false;
  }

  // right slide when rotated right with right button pressed
  if (sliding == false && slide == -3 && leanR == true) {
    Keyboard.press(' ');
    Keyboard.press('D');
    //delay(debounce);
    Serial.println("sliding right");
    //Serial.println(slide);
    sliding = true;
  }
  if (sliding == true && leanR == false) {
    Keyboard.release(' ');
    Keyboard.release('D');
    //Serial.println("stopped sliding");
    sliding = false;
  }
  if (slide == 1 && leanL == false) {
    Keyboard.press('A');
  }
  if (slide == -1 && leanR == false) {
    Keyboard.press('D');
  }

}

// Flap
void zoomY() {
  float y = CircuitPlayground.motionY();

  // map to accelerometer for zoom
  int zoom = map(y, -10, 10, -3, 3);

  // zoom when pointed down
  if (zooming == false && zoom >= 2) {
    Keyboard.press('W');
    zooming = true;
  }
  if (zooming == true && zoom <= 1 || leanL == true || leanR == true) {
    Keyboard.release('W');
    zooming = false;
  }
}